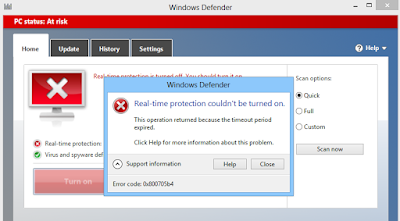
Solutions to Permanently Disable Windows Defender in Windows 10
Windows Defender Antivirus is inbuilt in Windows 10, and it safeguards the device and data from threats such as malware. Even though this program offers strong real-time protection, and gets automatically disabled when any other security program gets identified, users cannot remove and uninstall it in Windows 10. But, there are a few ways to disable Windows Defender permanently. Without further ado, let’s go through the different solutions for disabling this Windows 10 default antivirus.
Steps for turning off Windows Defender with Local Group Policy
Windows 10 users can go to Local Group Policy Editor and turn off Windows Defender. Follow the steps given below:
- Launch the Run command box by hitting the Windows and R keys simultaneously.
- In the Run box, input the following command: gpedit.msc and hit the OK button.
- Now the Local Group Policy Editor will open.
- You need to go to Computer Configuration and then click on Administrative Templates.
- Select Windows Components.
- Click on Windows Defender Antivirus from the list.
- Now, go to the right-hand side and click twice on Turn off Windows Defender Antivirus option.
- After that, choose the Enabled option in order to turn off Windows Defender.
- Click the Apply button at the bottom.
- Hit the OK button.
- When you have applied all the steps, reboot the PC in order to make the changes effective.
The shield option will be present in the toolbar notification section. However, it is because this option is a component of the Windows Defender Security Center and not a component of the antivirus.
If you wish to re-enable the Windows Defender Antivirus, then you can do it the same way, just choose the Not Configures option.
Steps for disabling Windows Defender from the Registry
If you cannot access the Local Group Policy Editor, then you can change the registry and turn off Windows Defender permanently. Here’s how:
- With the help of Windows + R keyboard shortcut, prompt the Run command box.
- Enter the following text in the box:
- Click on the OK button.
- When the Registry opens, click on HKEY LOCAL MACHINE.
- Now, select Software.
- Go to Policies and click on Microsoft.
- Click on Windows Defender.
- If you are unable to locate DisableAntiSpyware DWORD, then right-click on the Windows Defender entry,
- Choose New from the pop-out menu and select DWORD.
- Give the key the name of DisableAntiSpyware and hit Enter.
- Click twice on the new DWORD and in the Value data option, type 1.
- Click on the OK button.
- When you have completed all the steps, just start the computer again to make the changes effective.
Steps to turn off Windows Defender from the Security Center application
If you wish to turn off Windows Defender for a temporary basis, follow these steps:
- Launch the Windows Defender Security Center app.
- Now, select Virus and threat protection.
- Click on the blue Virus and threat protection settings link.
- Toggle the Real-time protection off for Windows Defender Antivirus.
After completing the steps, the Windows Defender shall turn off the real-time protection for a while, and in that time you can install apps or do other tasks that were blocked by it.
But, since this is not a permanent solution, whenever you reboot the Windows 10 PC, the Windows Defender will get enabled automatically on the device.
Emma Justine is a self-professed security expert; she has been making the people aware of the security threats. Her passion is to write about Cyber security, cryptography, malware, social engineering, internet and new media. She writes for Norton security products at norton.com/setup.


Comments
Post a Comment